
How to add Wall Art to your website
Learn how to add the Wall Art widget to your website — from adding your domain to configuring the element parameters.
1. Go to your dashboard and select the Wall Art • All Platforms workspace.
2. Add your domain — enter your website URL in the field. For example: web-site.shop
3. A script and element parameters will appear on the page. Copy both and add them to your website.
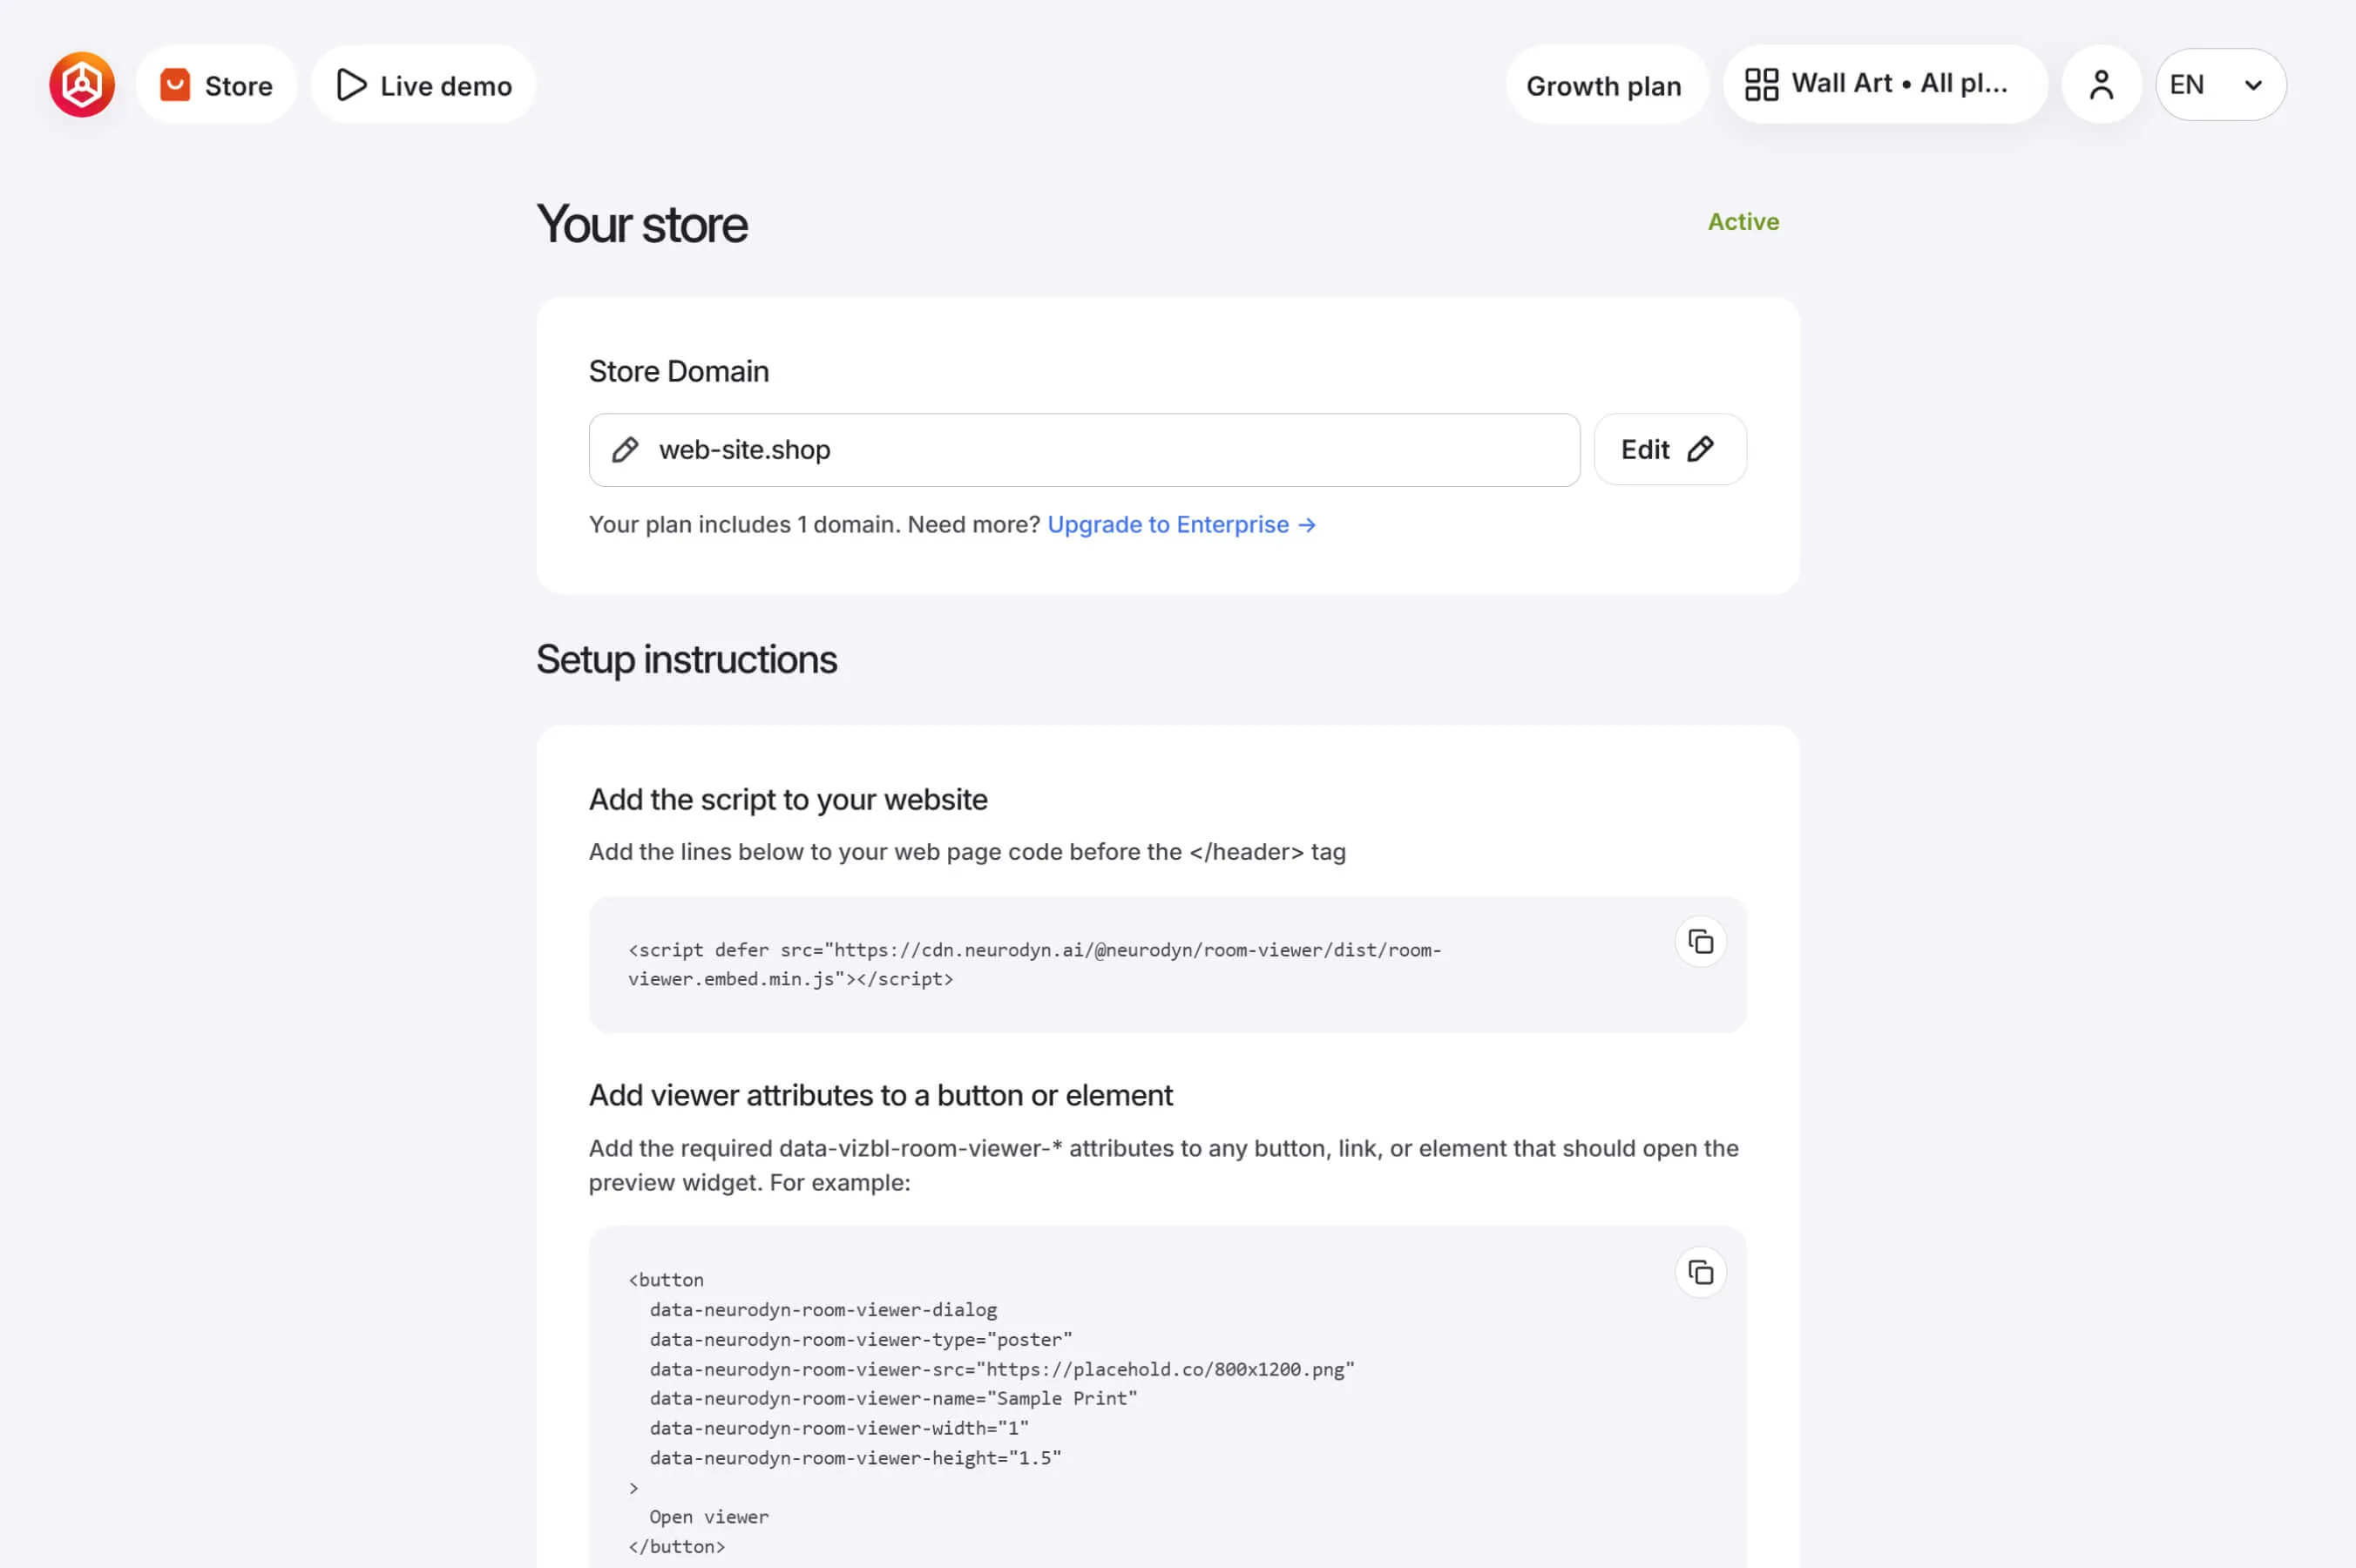
**Script
**This script enables Vizbl Wall Art on your site. Add it to your website before the tag:
<script defer src="https://cdn.neurodyn.ai/@neurodyn/room-viewer/dist/room-viewer.embed.min.js"></script>**Element parameters
**Add these parameters to the button or link that triggers the Wall Art preview:
You only need to edit four parameters:
data-neurodyn-room-viewer-src— URL of your product image.data-neurodyn-room-viewer-name— your product name.data-neurodyn-room-viewer-width— actual width in meters.data-neurodyn-room-viewer-height— actual height in meters.
If your store lists dimensions in millimeters or centimeters, convert them to meters. For example, a 700×1200mm print becomes:
data-neurodyn-room-viewer-width="0.7"data-neurodyn-room-viewer-height="1.2"
Width and height should reflect the image size only, not including the frame.
Do not edit or remove these parameters — the widget won’t launch if they’re misconfigured:
data-neurodyn-room-viewer-dialogdata-neurodyn-room-viewer-type="poster"- data-neurodyn-room-viewer-api-key
Optional parameters
These are not required — the widget works without them:
data-neurodyn-room-viewer-language— interface language. Available options: en, ru.data-neurodyn-room-viewer-dimension-unit— units shown to the customer. Defaults to inches. Available options: m, cm, in.
A configured element looks like this: