
Adding an AI Try-On widget to your website
How to add the Vizbl AI Try-On widget to a product page, so shoppers can see an item on themselves before they buy.
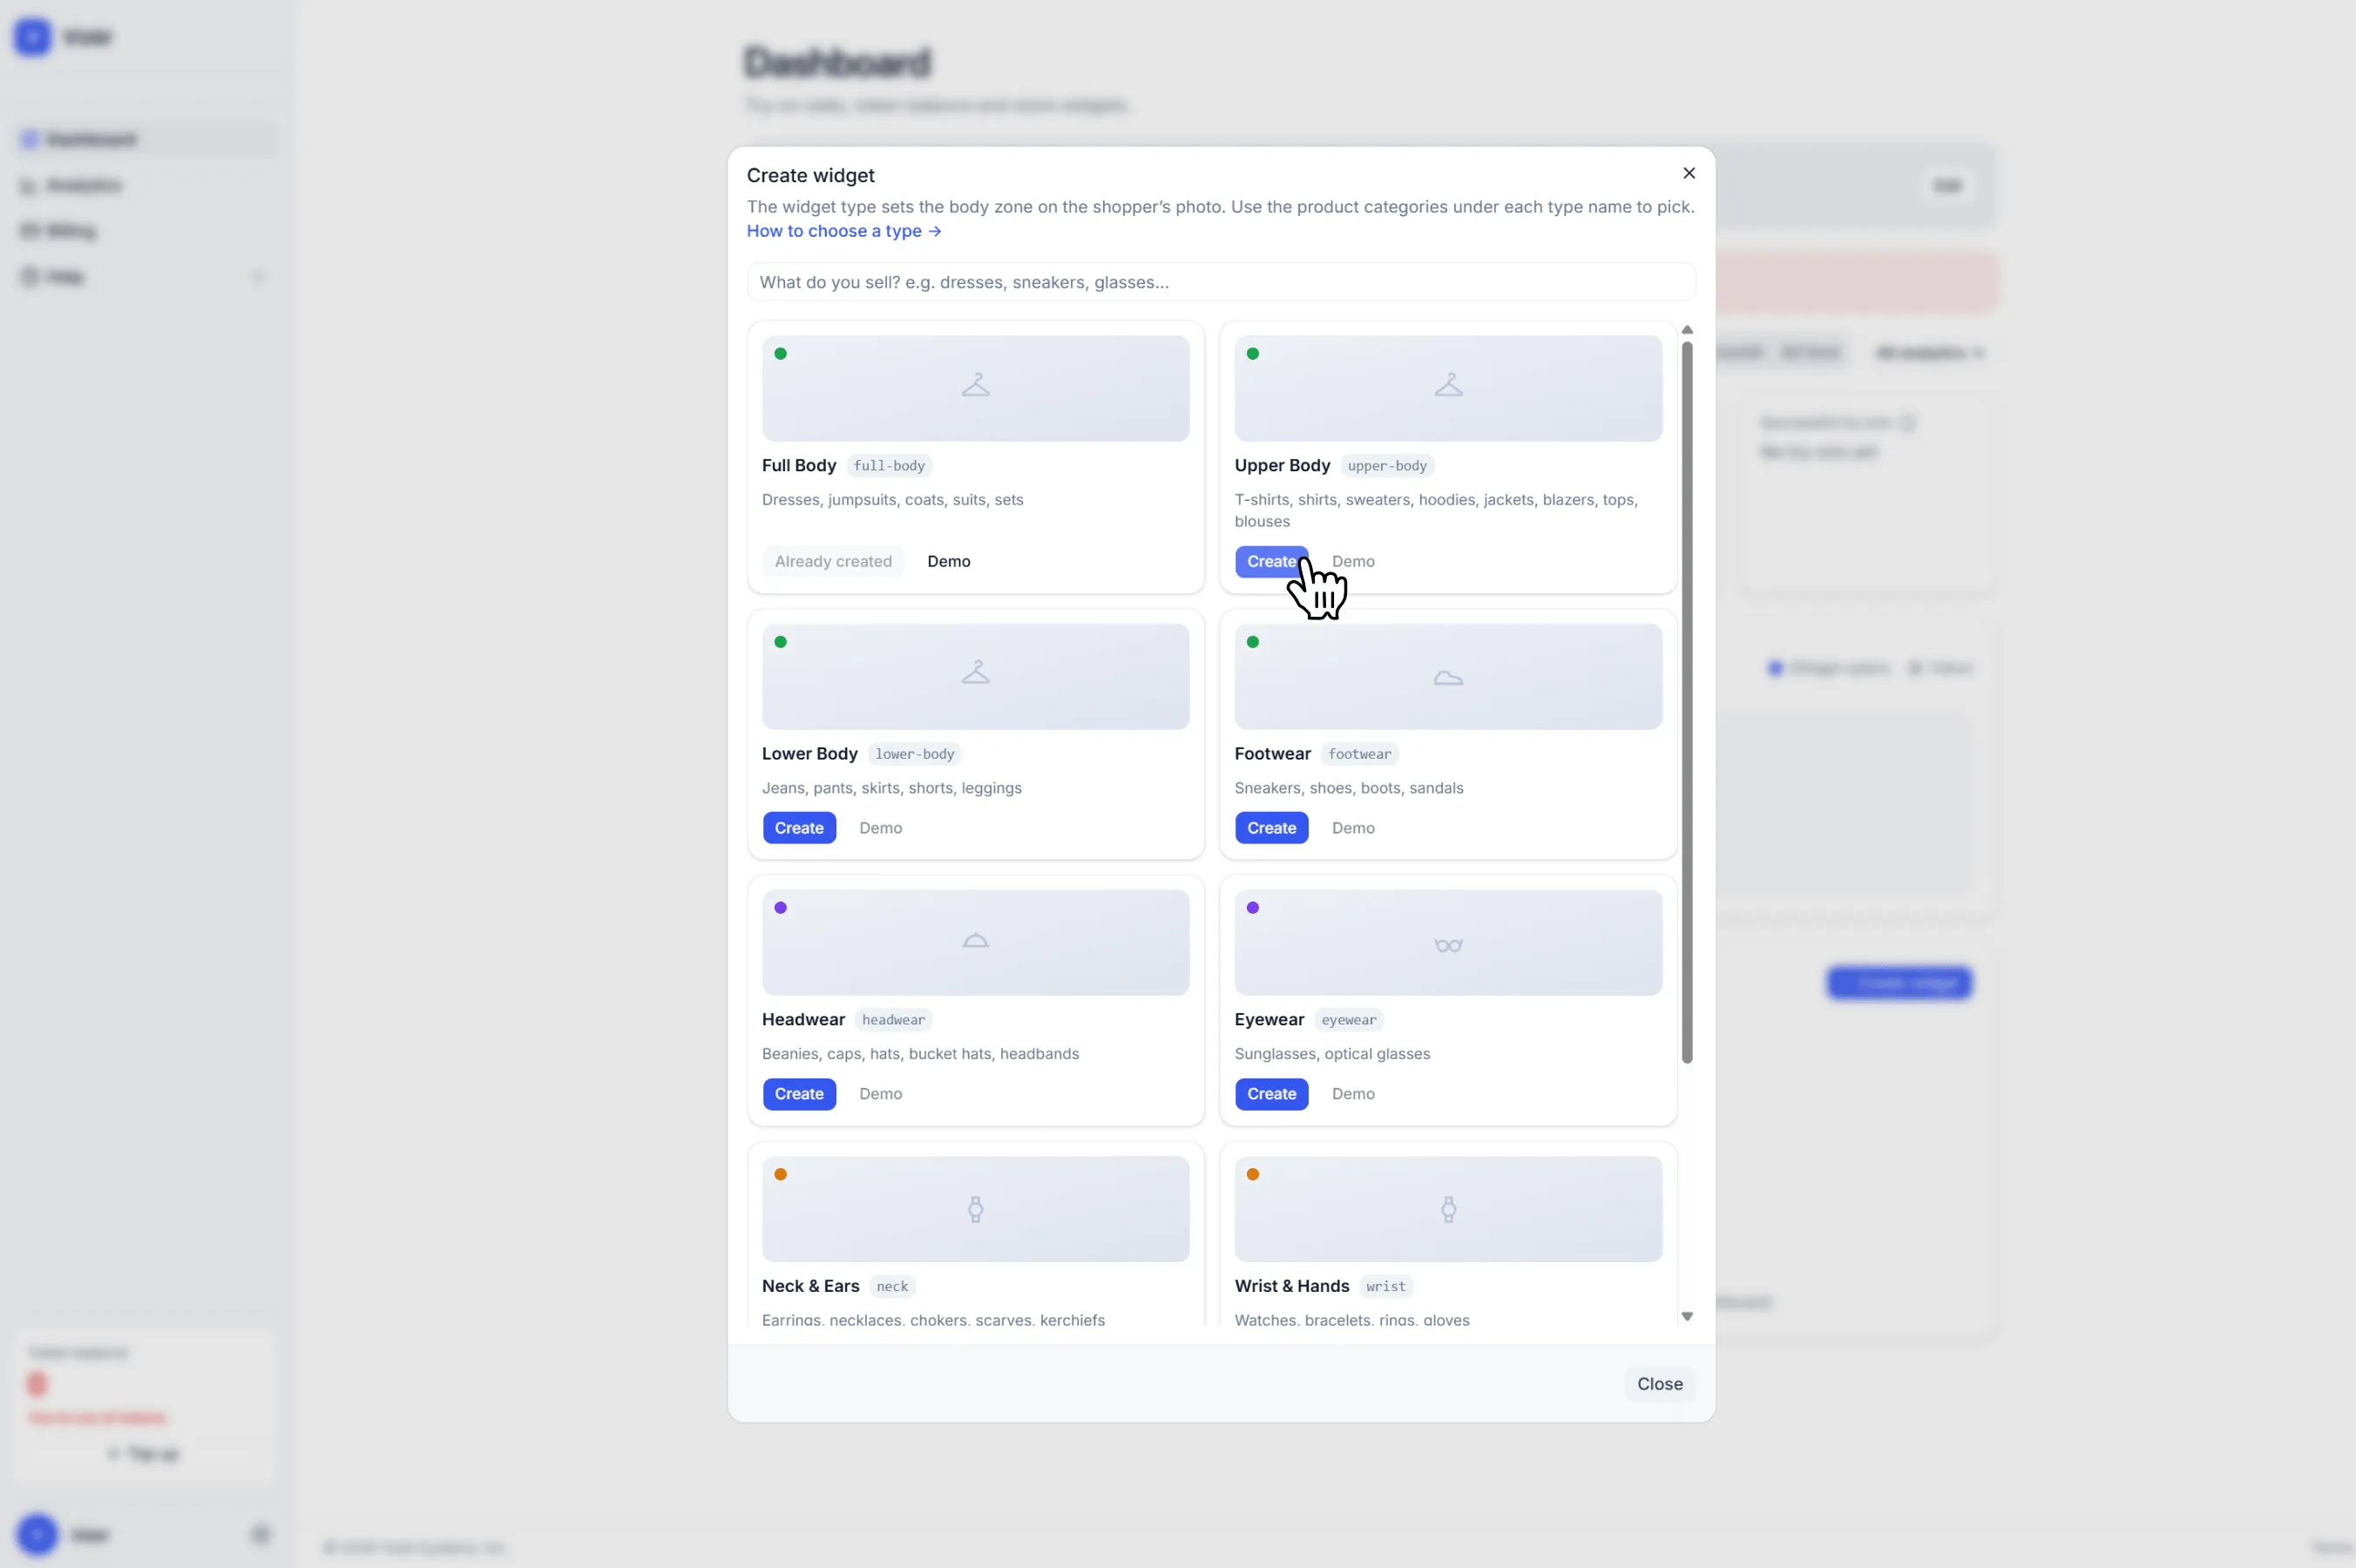
1. Open your AI Try-On dashboard and click Create widget in the Your widgets block.
2. Pick a widget type and click Create.
3. You’ll get a script and element code in the same window — both need to go on your site.
4. Once active, the widget appears in the Your widgets block. Widgets can’t be deleted after creation.
If you haven’t gone through onboarding yet, add your domain first — enter your site address as shop.com, no protocol, www, or path. The integration won’t work otherwise.
You can update or remove your domain at any time. See the separate guide for details.
Script
Add this to your site’s <head> once — it works with every widget type you create:
On a CMS like WordPress, add it to your site template.
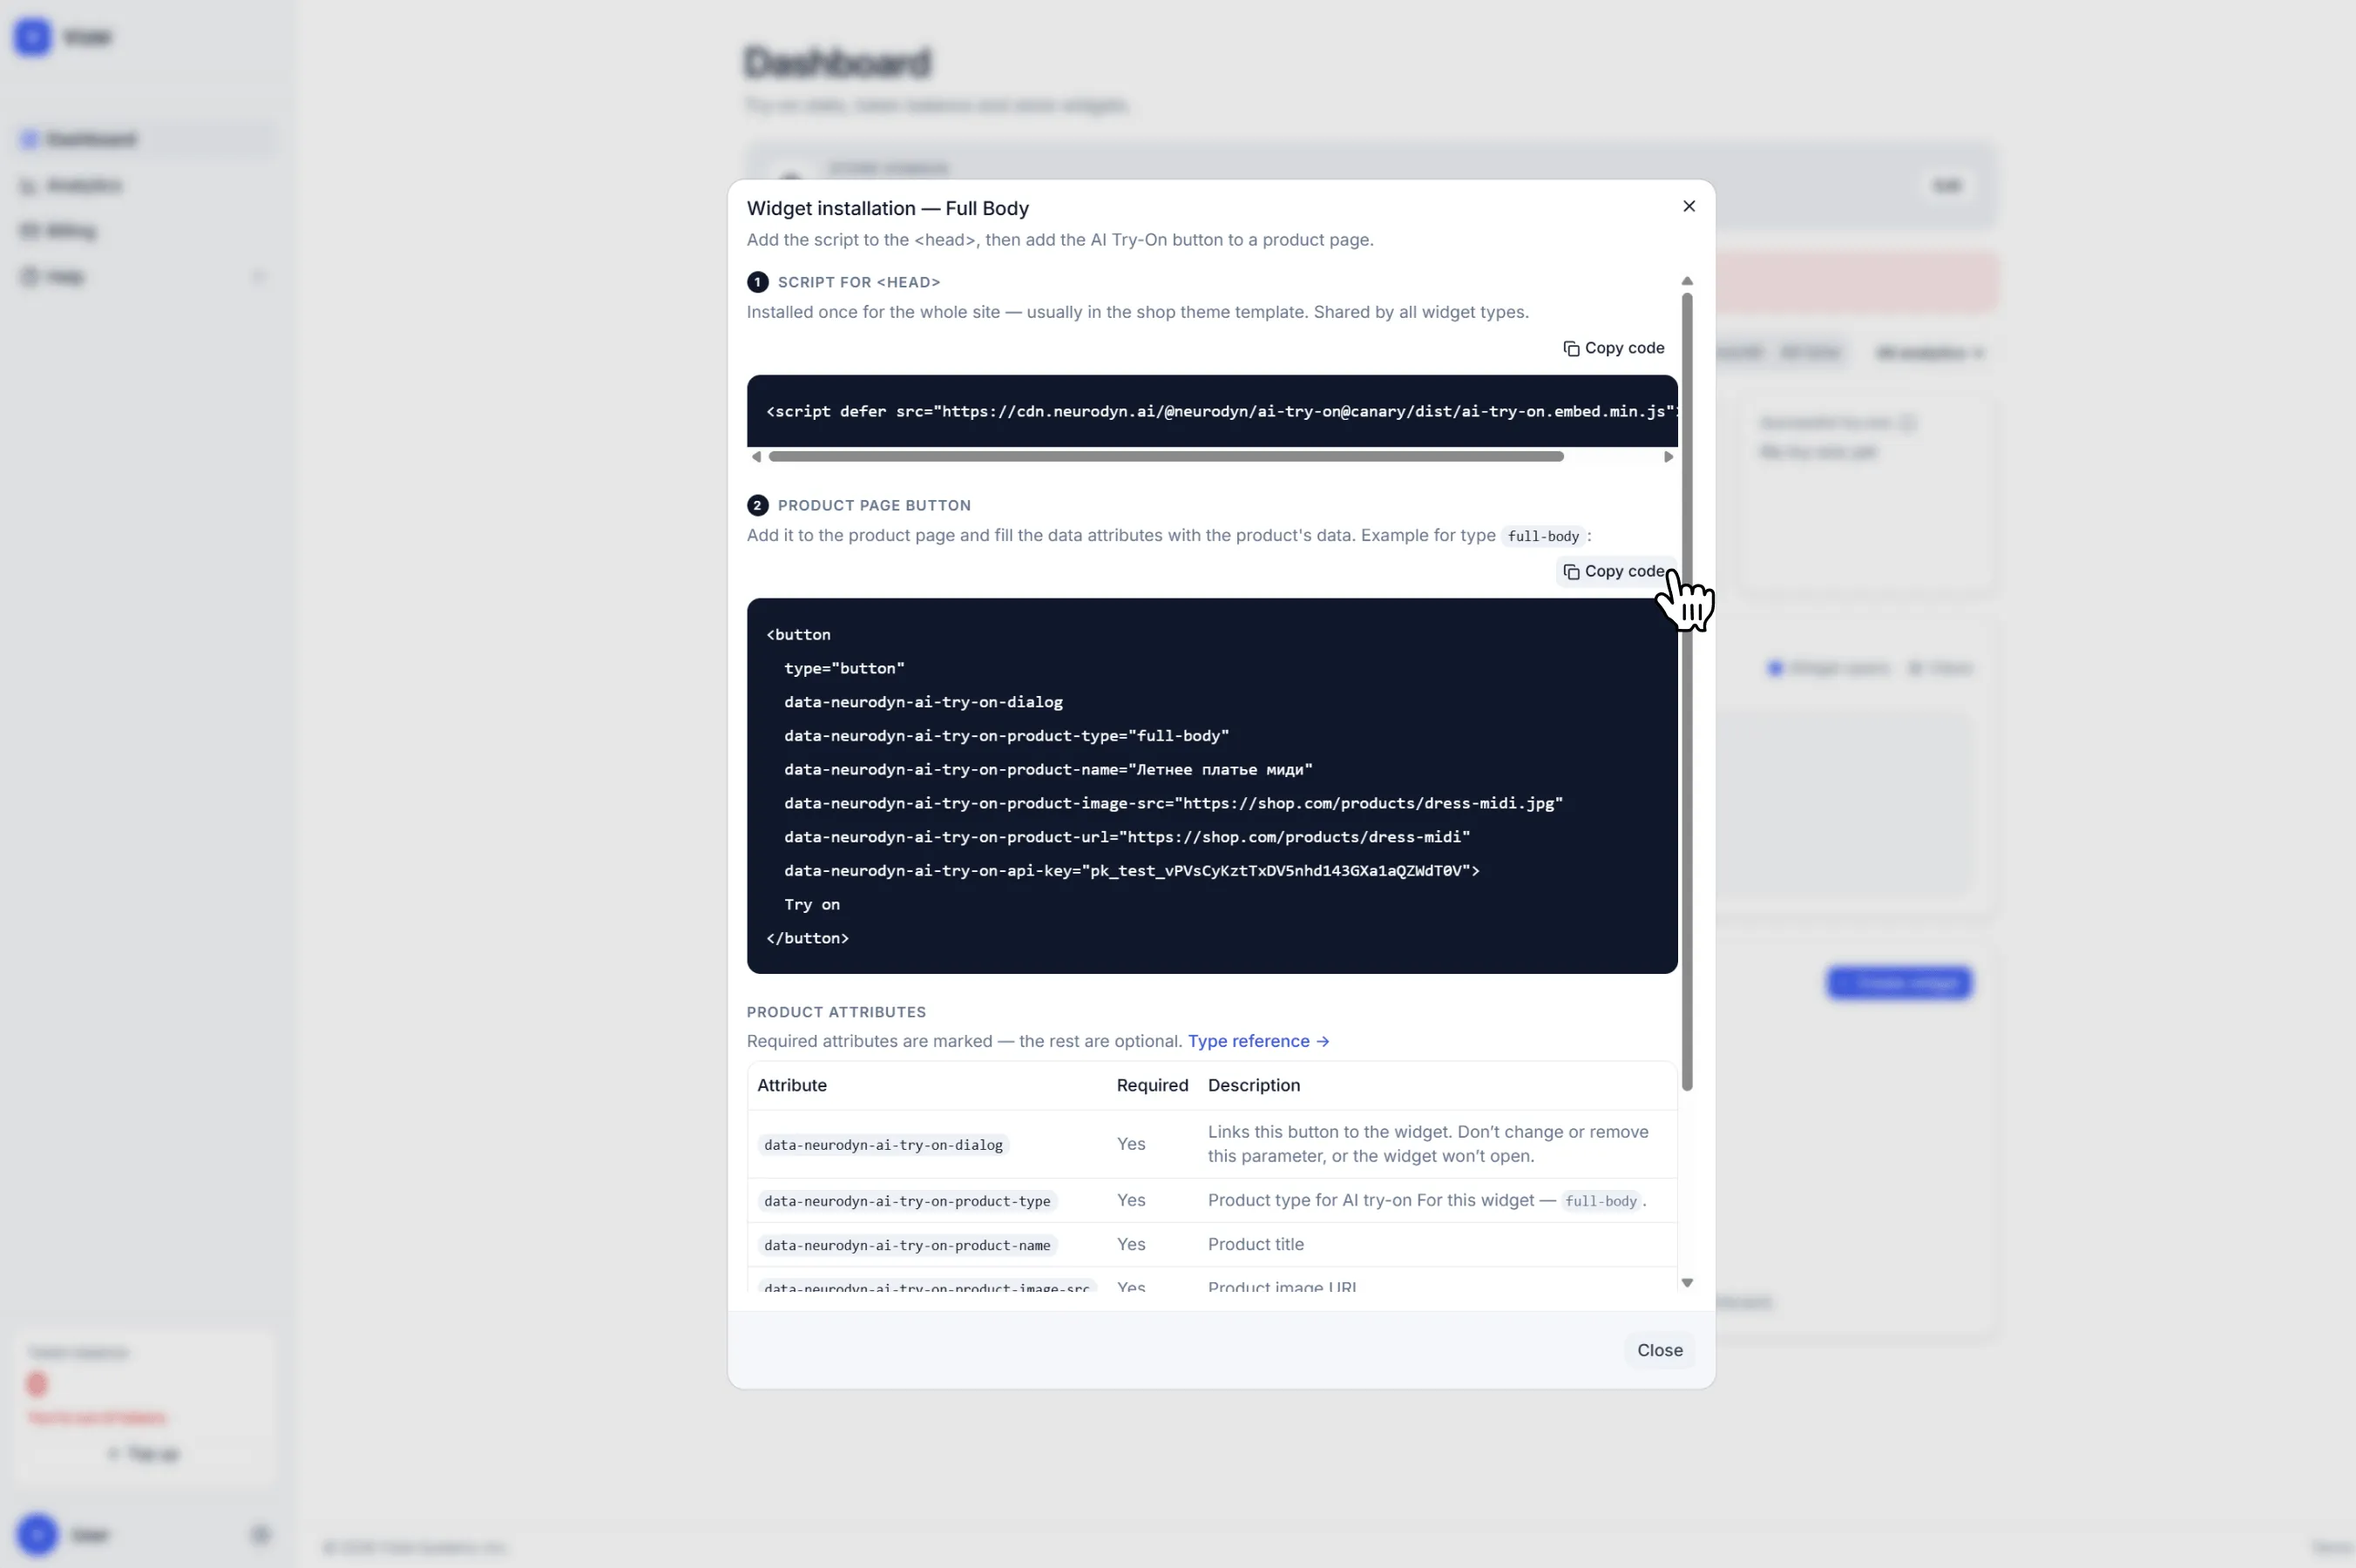
Element parameters
Add these to whichever element triggers the AI Try-On. Each product needs its own set.
Here’s what the code looks like:
Update these three for each product:
data-neurodyn-ai-try-on-product-name— your product name.data-neurodyn-ai-try-on-product-image-src— a direct URL to the product image in JPEG or PNG. This is what the AI uses for the try-on.data-neurodyn-ai-try-on-product-url— the product page URL.
Don’t touch these — they’re pre-filled when you copy the code from your dashboard, and changing them will break things:
data-neurodyn-ai-try-on-dialog— required for the widget to open.data-neurodyn-ai-try-on-product-type— defines the widget type.data-neurodyn-ai-try-on-api-key— your public integration key.
To preview how different widget types behave, click Demo next to any widget in your dashboard. Demo sessions don’t draw from your token balance.
Adding parameters to your product page template
If your product pages are built from a template, you can populate the AI Try-On parameters with the same data — no need to edit the code by hand for every product.
Here’s what it might look like in a template:
In this example, product.name, product.image, and product.url are automatically replaced with the current product’s data. Variable names and syntax vary by platform, so don’t copy the example as is.
If you built the site yourself, swap in the variables from your product page template. If a developer set it up, pass this guide along to them.
Get help in our Discord
Join our Discord to ask questions about these instructions or get technical support. If something isn’t working, open a ticket and our team will investigate.