
How to add a Vizbl Core AR integration to your website
Learn how to embed a 3D model on your site using any of the available Vizbl Core AR integration types.
Every model in your library can be embedded in multiple ways — pick the one that fits your product page.
If you haven’t gone through onboarding yet, you’ll need to add your domain first — enter your site address as shop.com, no protocol, www, or path. The integration won’t work otherwise.
You can update or remove your domain at any time. See the separate guide for details.
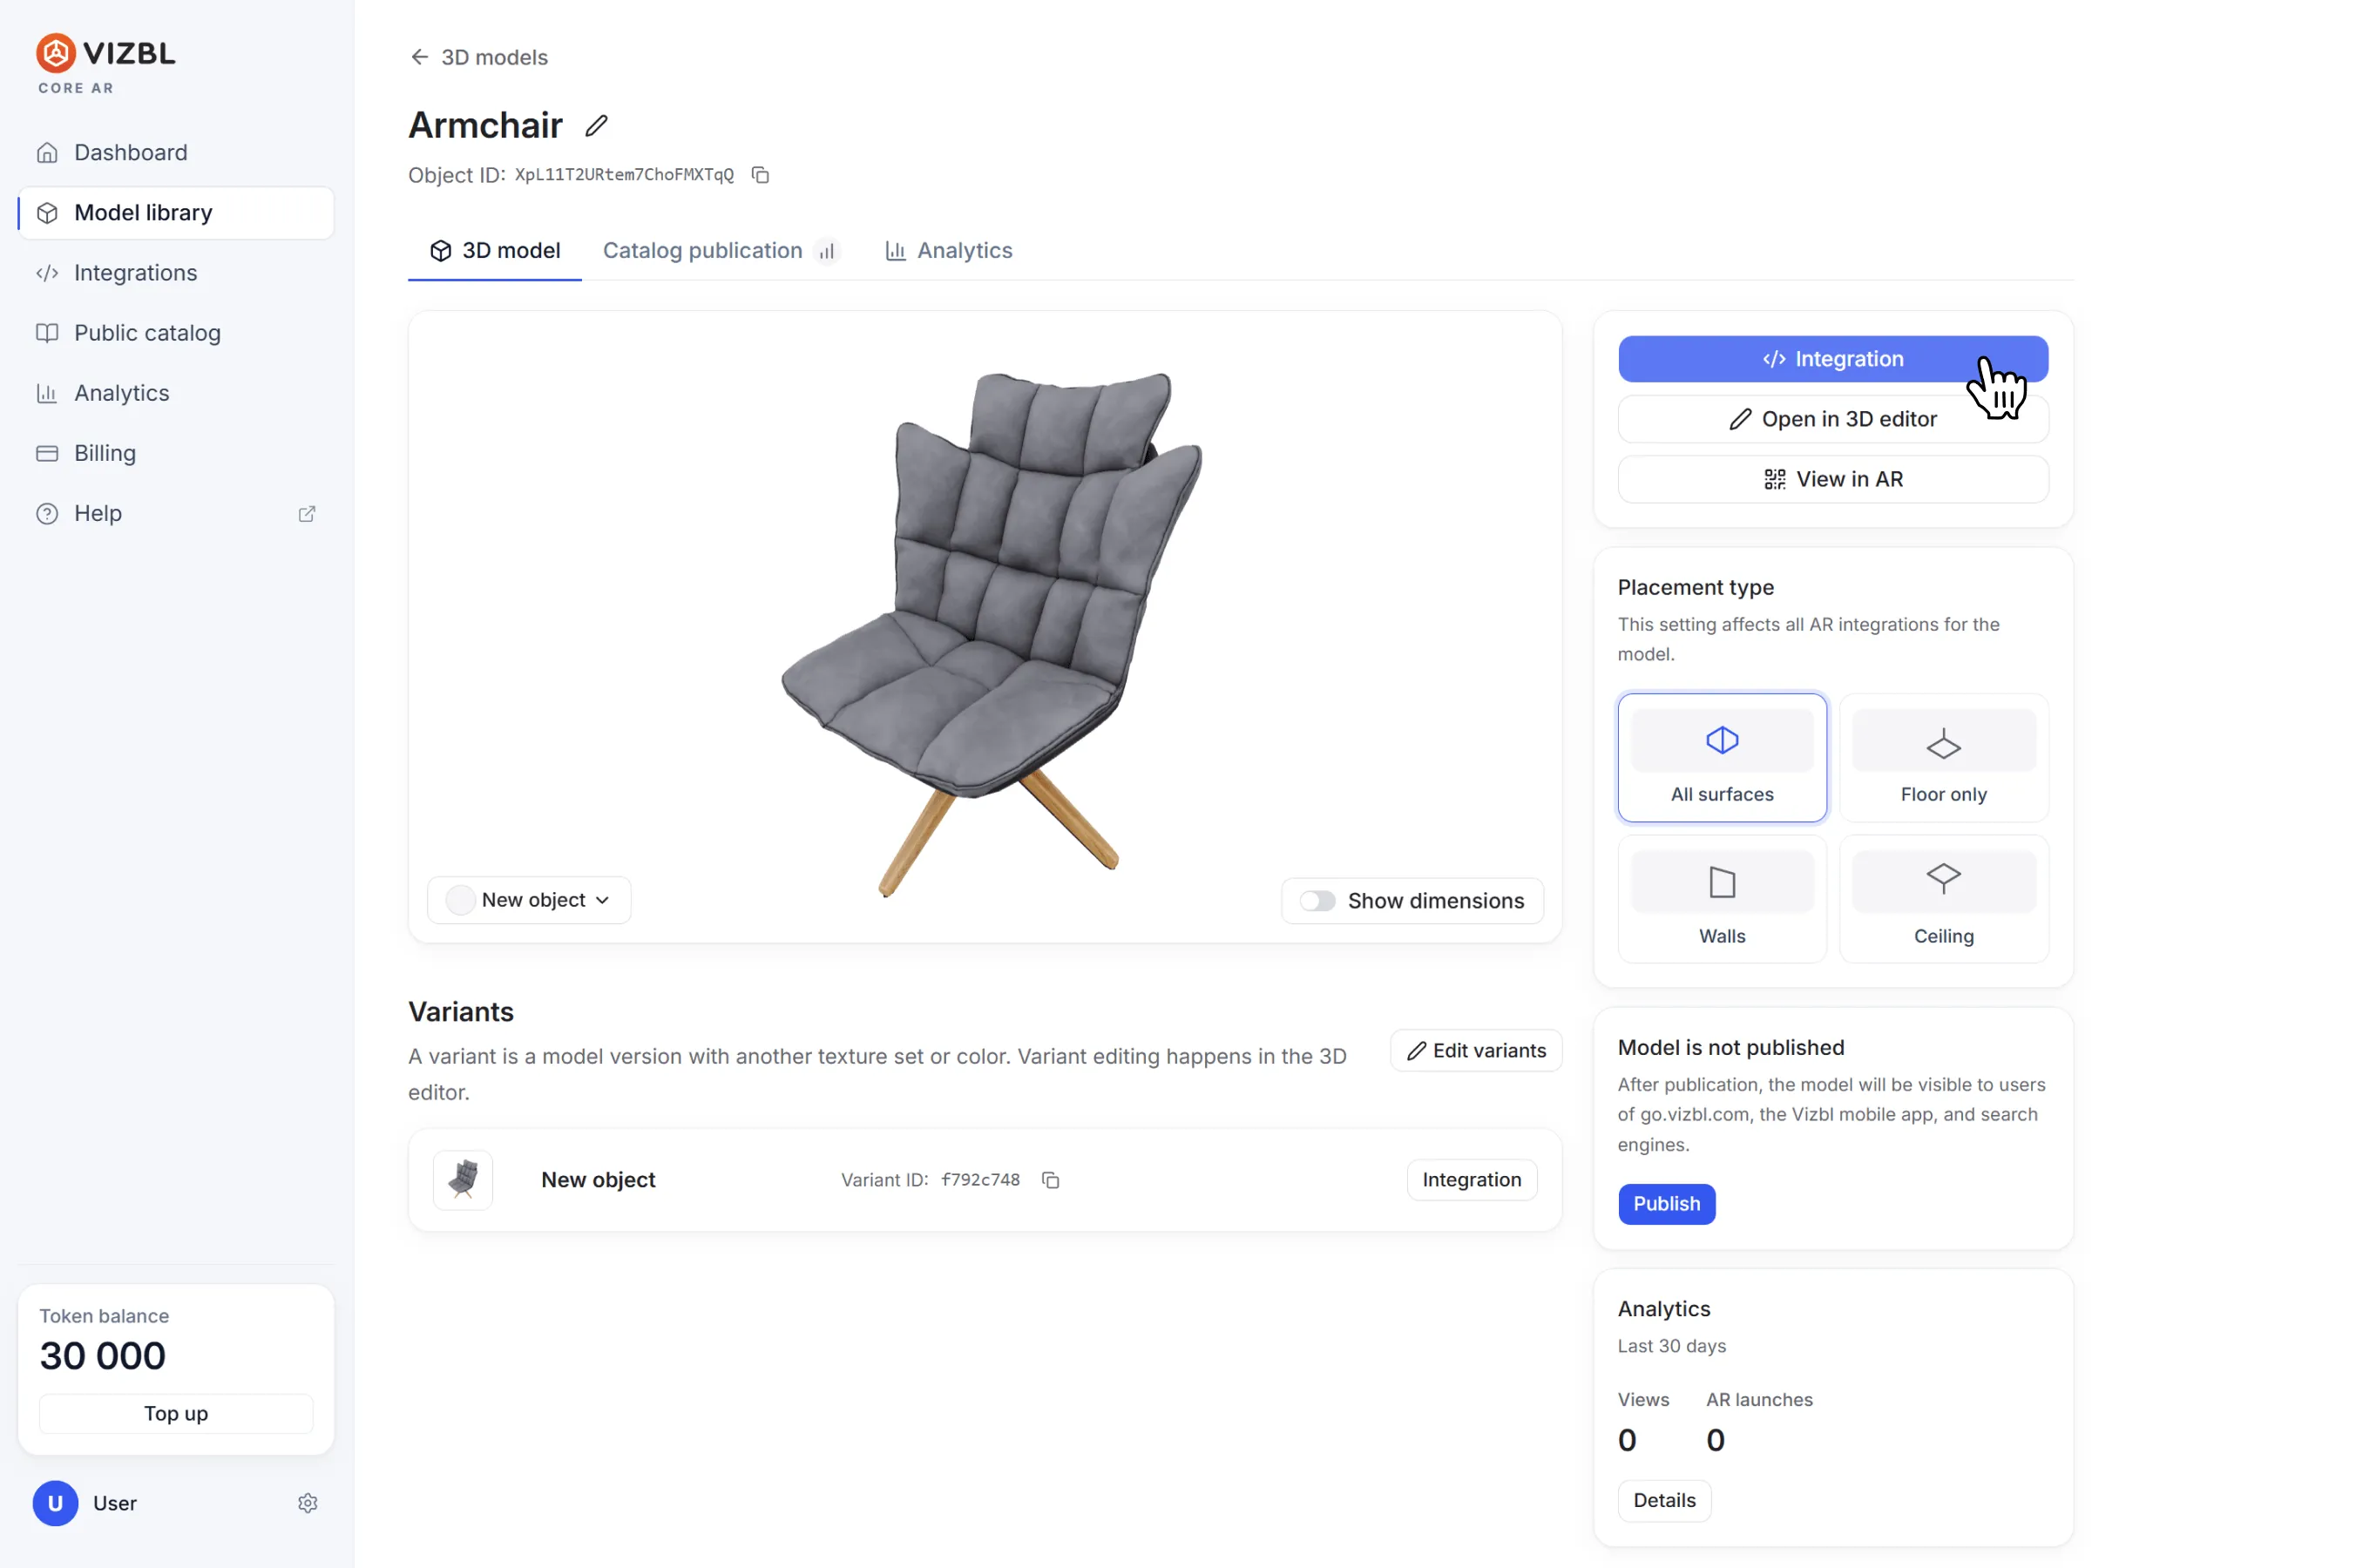
1. Open your Core AR dashboard.
2. Go to the model library and click any model.
3. Click Integration to the right of the model preview.
4. Select a integration type, model and variant.
Integration types
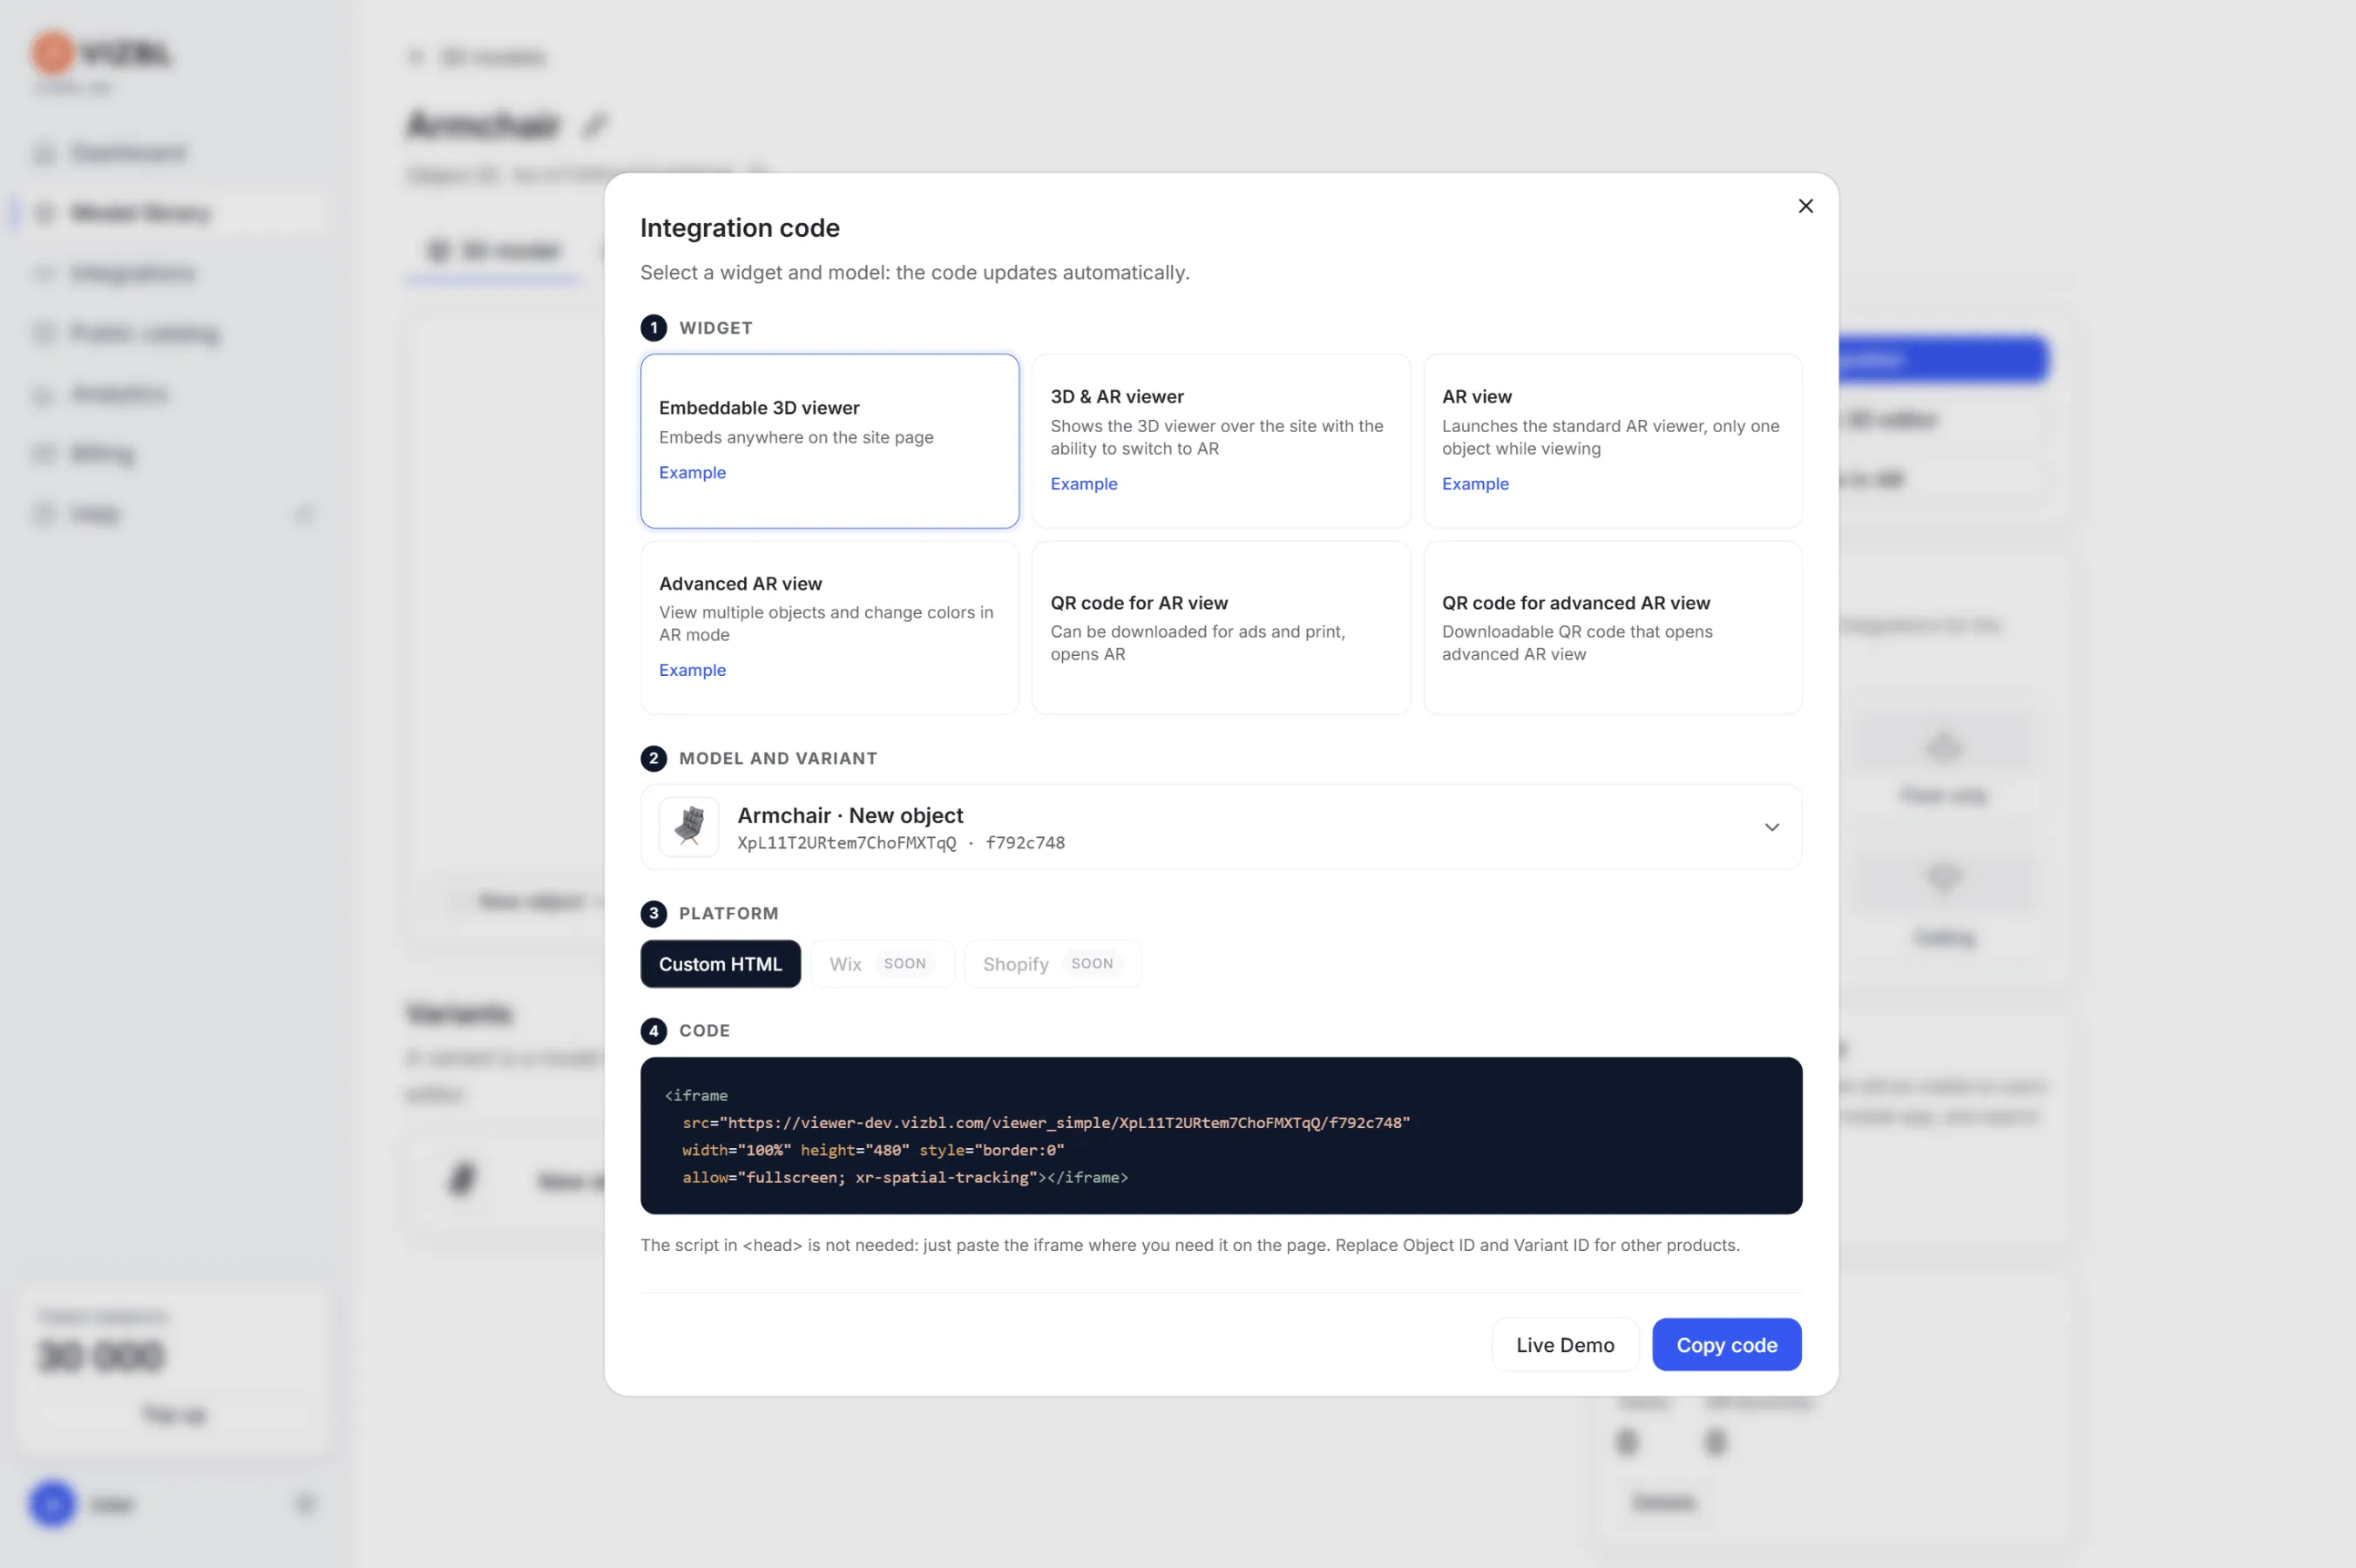
- Embeddable 3D viewer — lets customers rotate and zoom the model on your page. No AR. Free on all plans.
- 3D & AR viewer — opens the model in a popup with an option to launch AR.
- AR view — jumps straight to AR on tap.
- Advanced AR — lets customers place multiple products in one AR session.
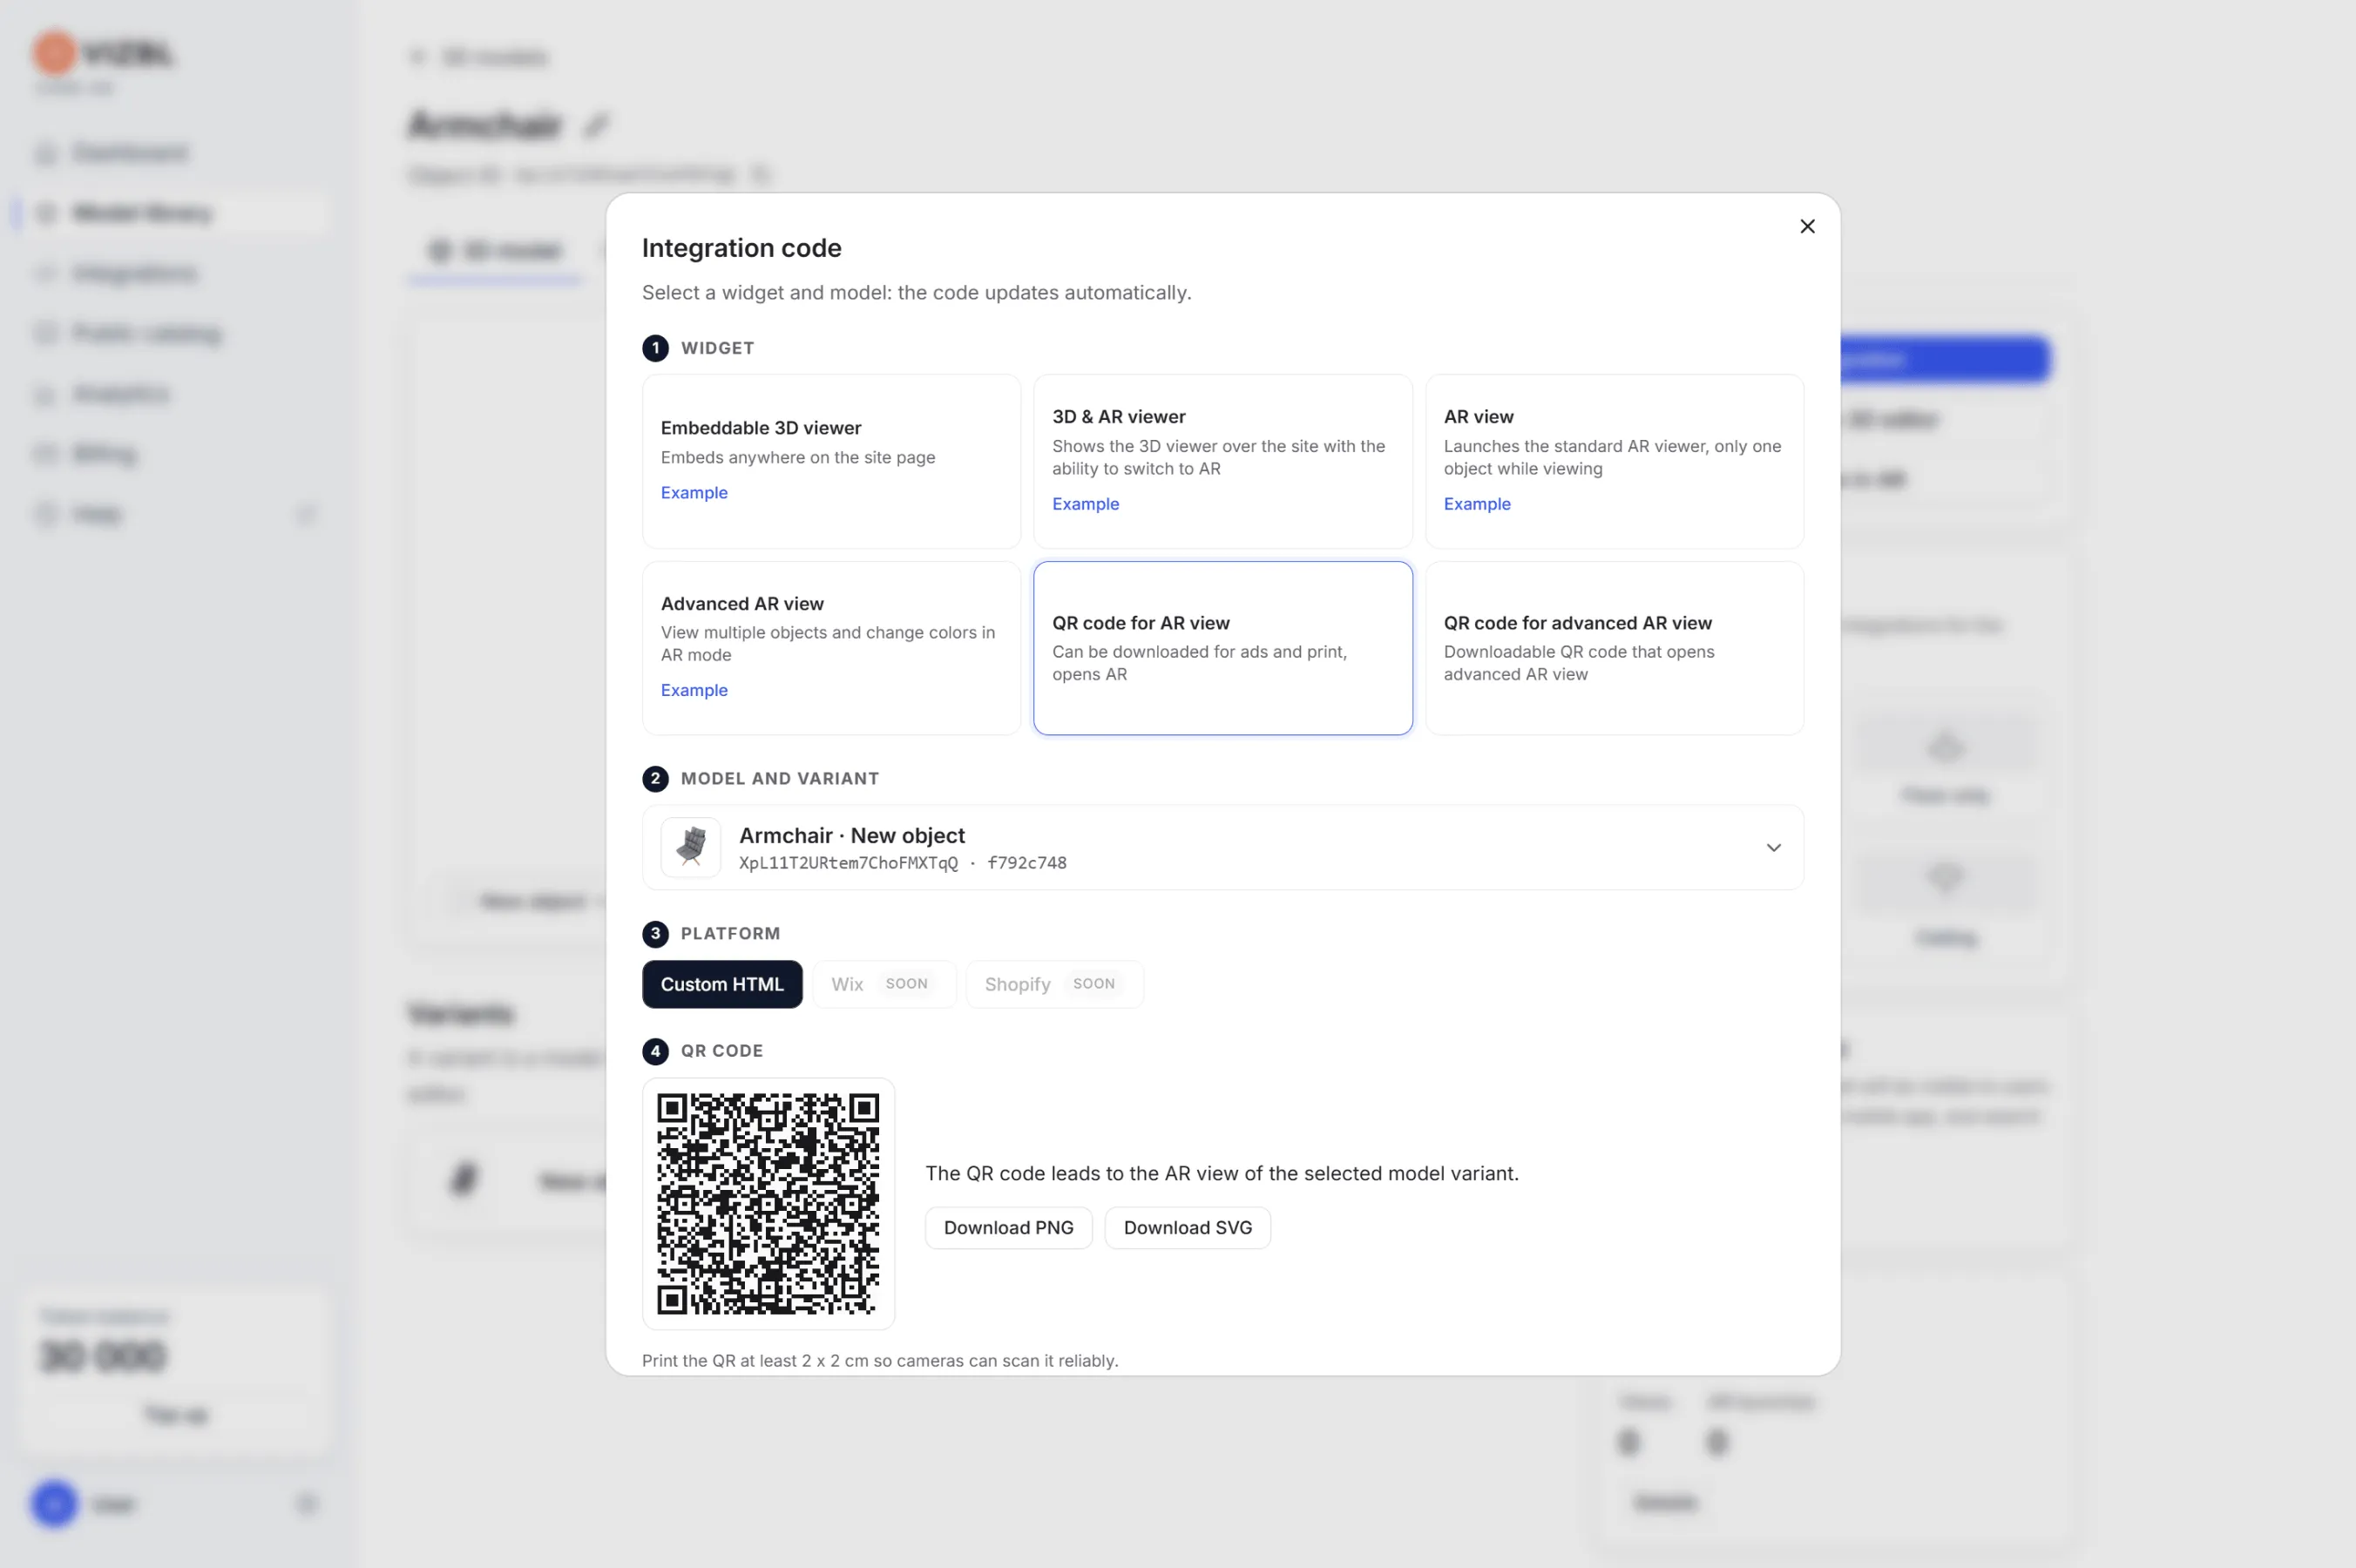
- QR code — links to AR view, standard or advanced. Print it for a showroom or catalog, embed it on your site, or use it in ads.
Preview any integration type right in the same window.
Adding an integration
3D viewer
Copy the iframe code and paste it into your page. Done.
3D & AR viewer, AR view, or Advanced AR
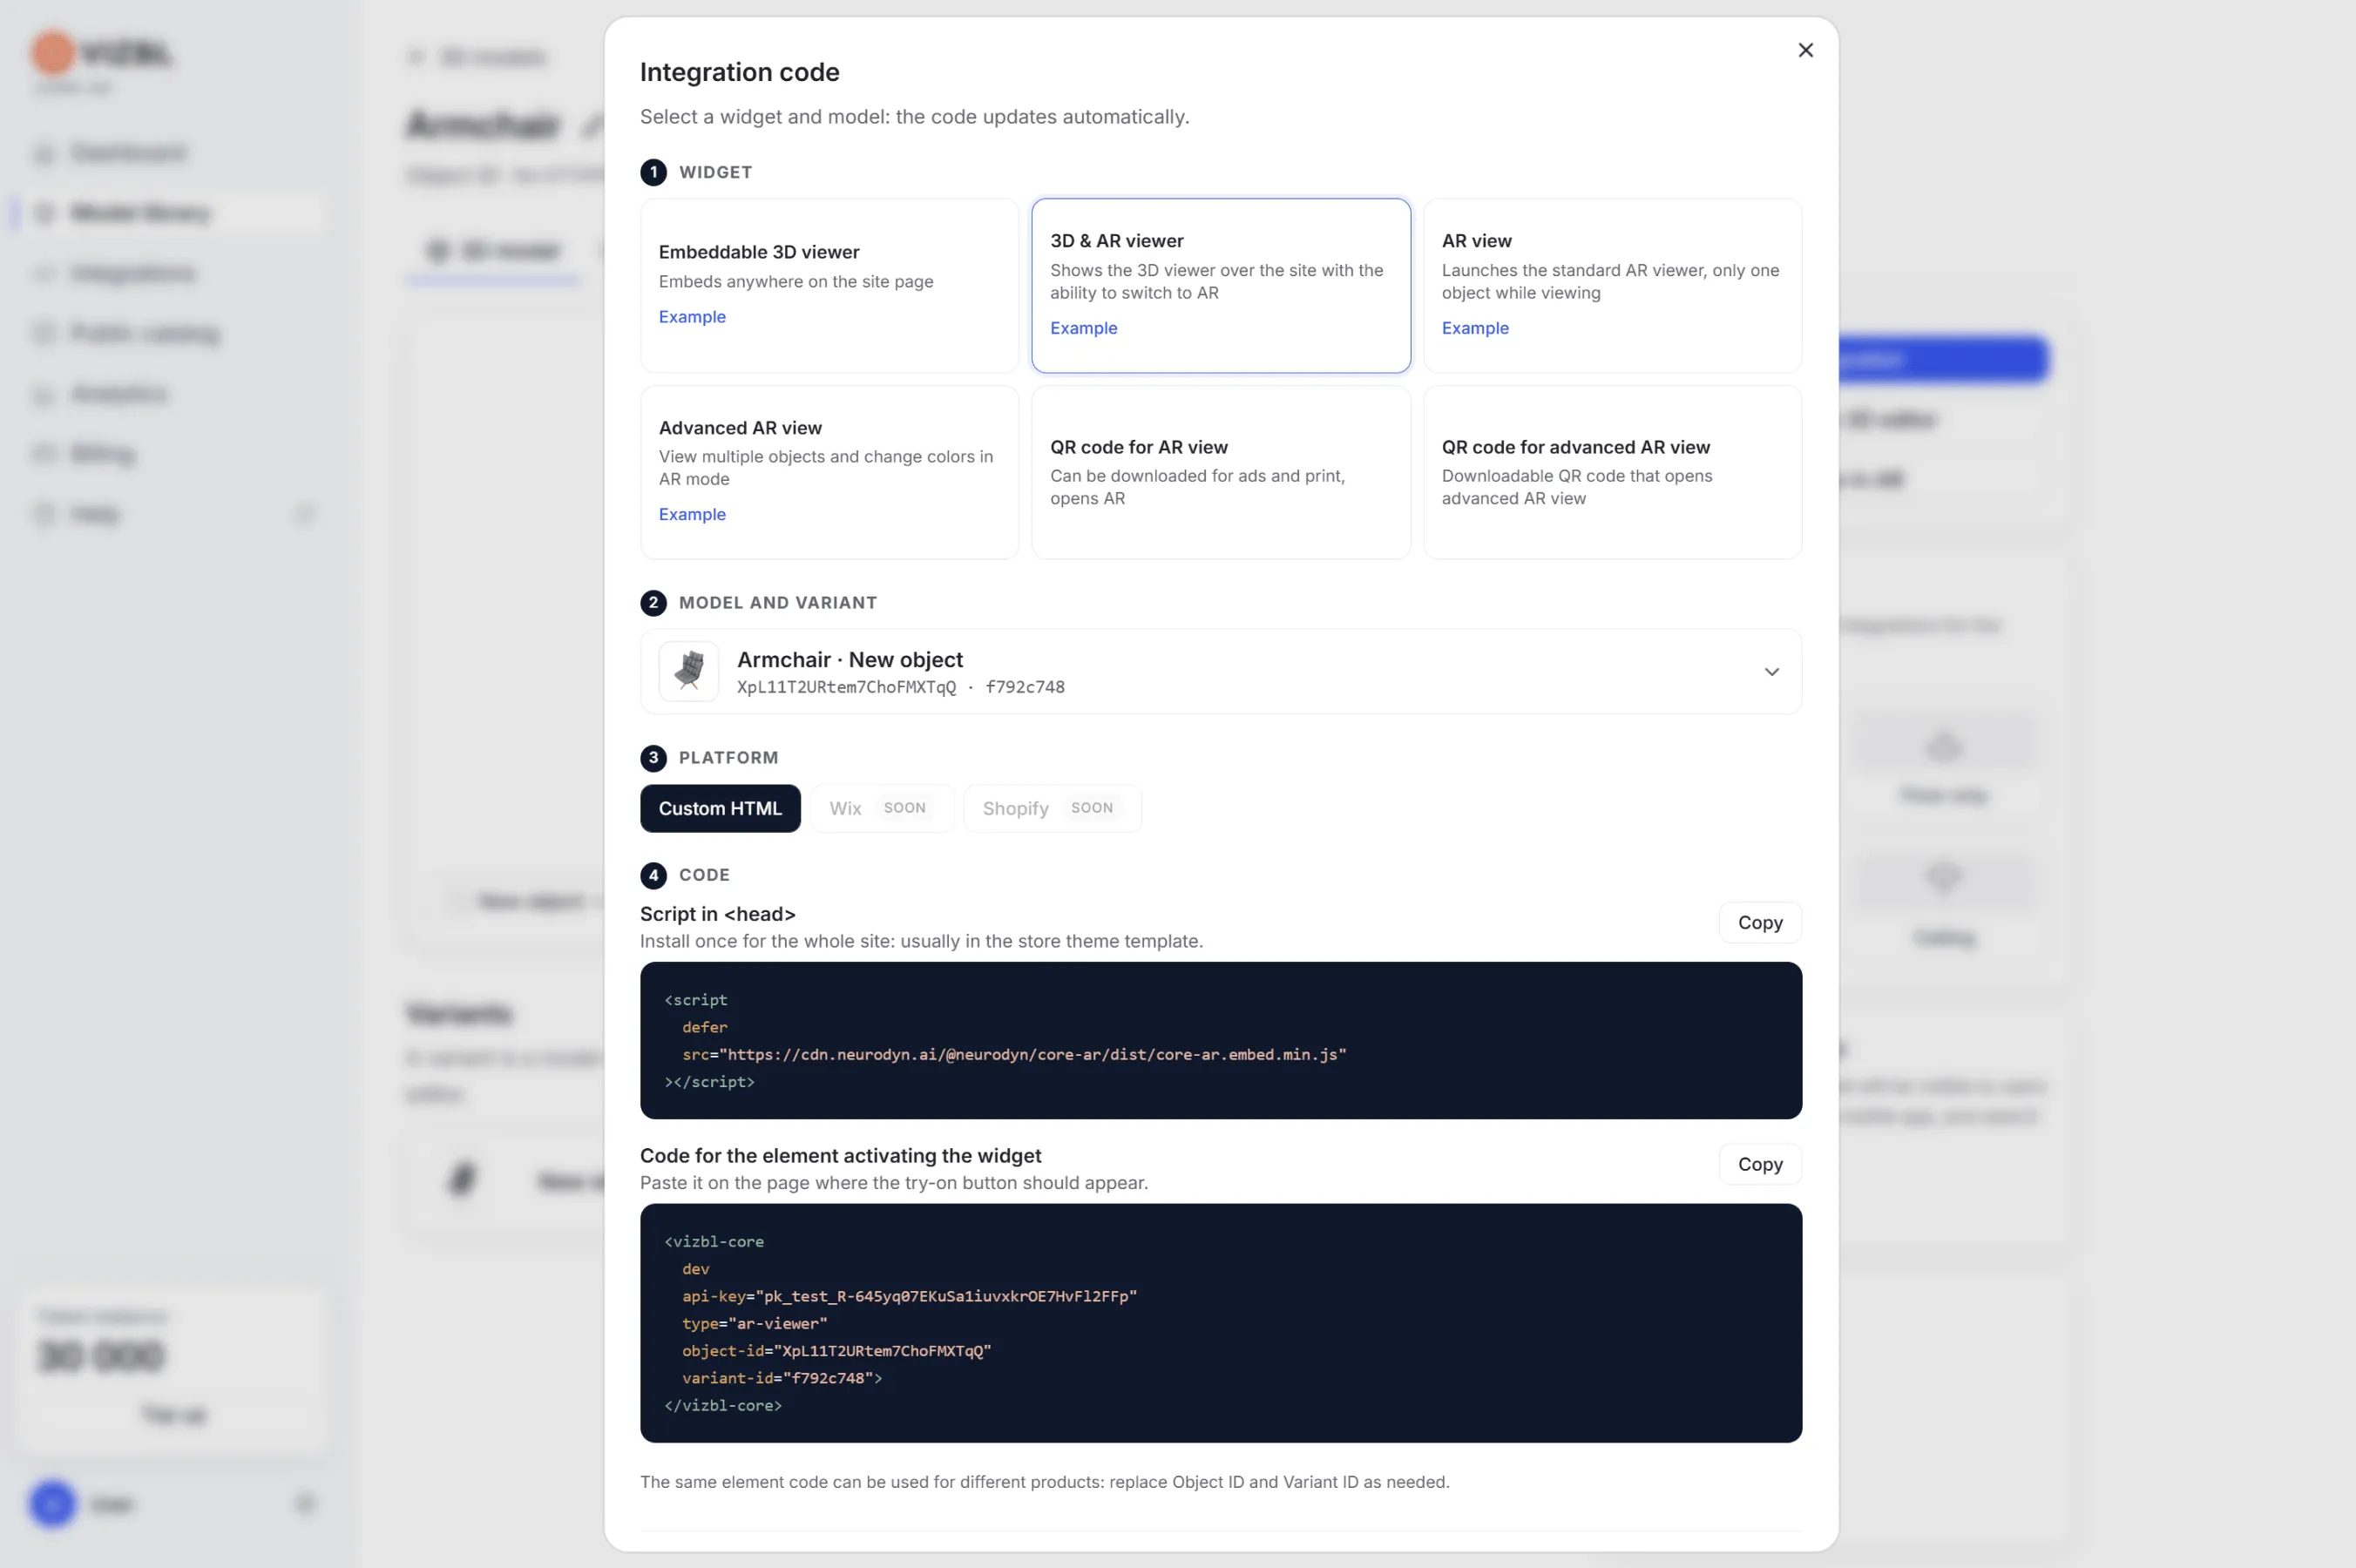
Once you pick an integration type, two code snippets appear: a script for your and an element that triggers the widget. Both are pre-configured for your selected model variant — nothing else to set up. The domain isn’t part of the code: one script works on every domain on your list.
- Add the script to your site’s . On a CMS like WordPress, add it to your site template.
- Paste the element code where you want the trigger to appear on the page.
One script works across all three integration types — the same script from the 3D & AR viewer settings will work with Advanced AR too.
The widget button comes fully styled out of the box — no setup required. To make it look like the rest of the buttons in your store, add two attributes to the <vizbl-core> element — they only work as a pair: unstyled turns off the widget’s built-in styles, and trigger-class applies your existing CSS class to the button:
If the styles don’t apply — make sure both attributes (unstyled and trigger-class) are present, and retype the spaces between attributes by hand: copying code from messengers or documents often brings in non-breaking spaces, which stop the browser from recognizing the attribute.
QR code
Download as PNG or SVG. Print at a minimum size of 2×2 cm so phone cameras can read it reliably.
Get help in our Discord
Join our Discord to ask questions about these instructions or get technical support. If something isn’t working, open a ticket and our team will investigate.