
Connecting the Vizbl 3D & AR Connector to your Shopify store
How to install the Vizbl 3D & AR Connector, activate it, and add your store domain.
The connector connects your Shopify store to your Vizbl Core AR dashboard. Once setup is complete, you can link your 3D models to products without writing any code, and the Vizbl button appears on your product pages automatically.
Installing the connector
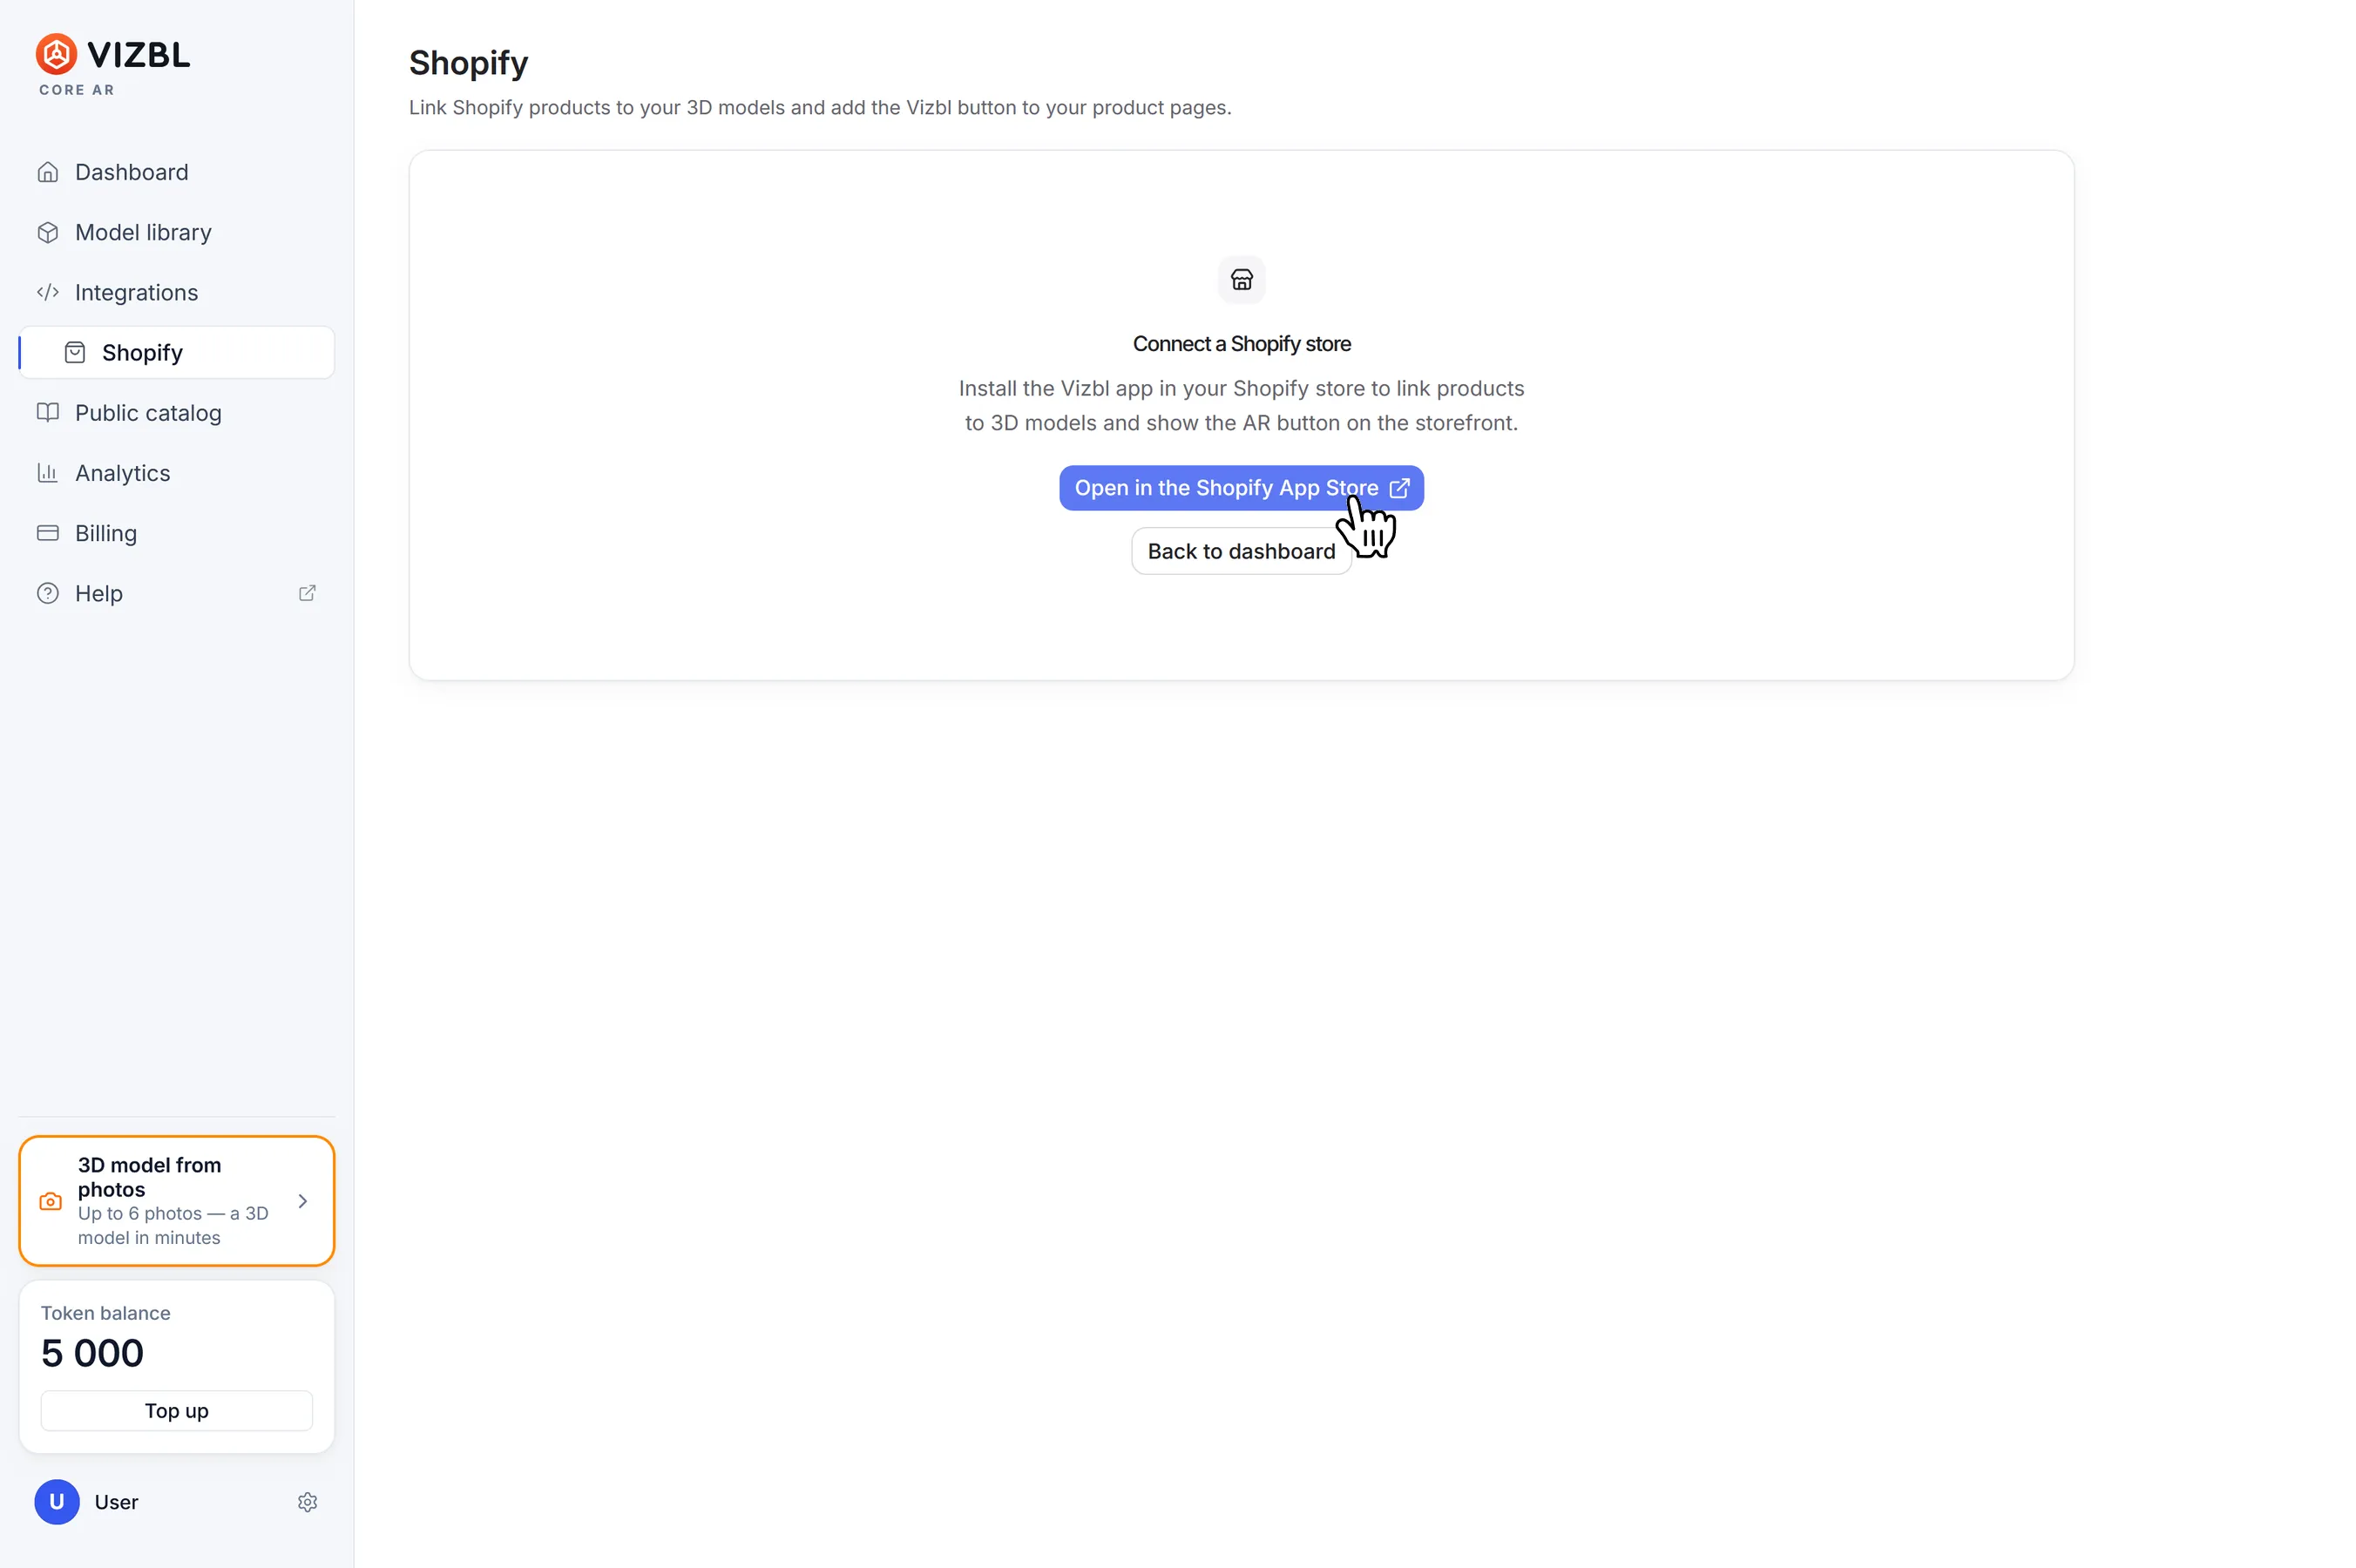
1. Go to the Vizbl 3D & AR Connector page in the Shopify App Store and add it to your store.
You can also get there from your Core AR dashboard: go to Integrations → Shopify in the left-hand menu and click Open in the Shopify App Store.
2. After installation, the connector opens in your Shopify admin. Sign in to your Vizbl account, or create one using your email address, Google account, or Apple ID. Each Vizbl account can be connected to only one store.
3. You’ll see a four-step setup checklist. The first step, Connect your Vizbl account, is already checked off.
Activating the connector
1. In the Activate your connector step, click Activate $20/mo and approve the charge in Shopify.
The subscription covers only the connector itself. Tokens for AR views are purchased separately in your Core AR dashboard.
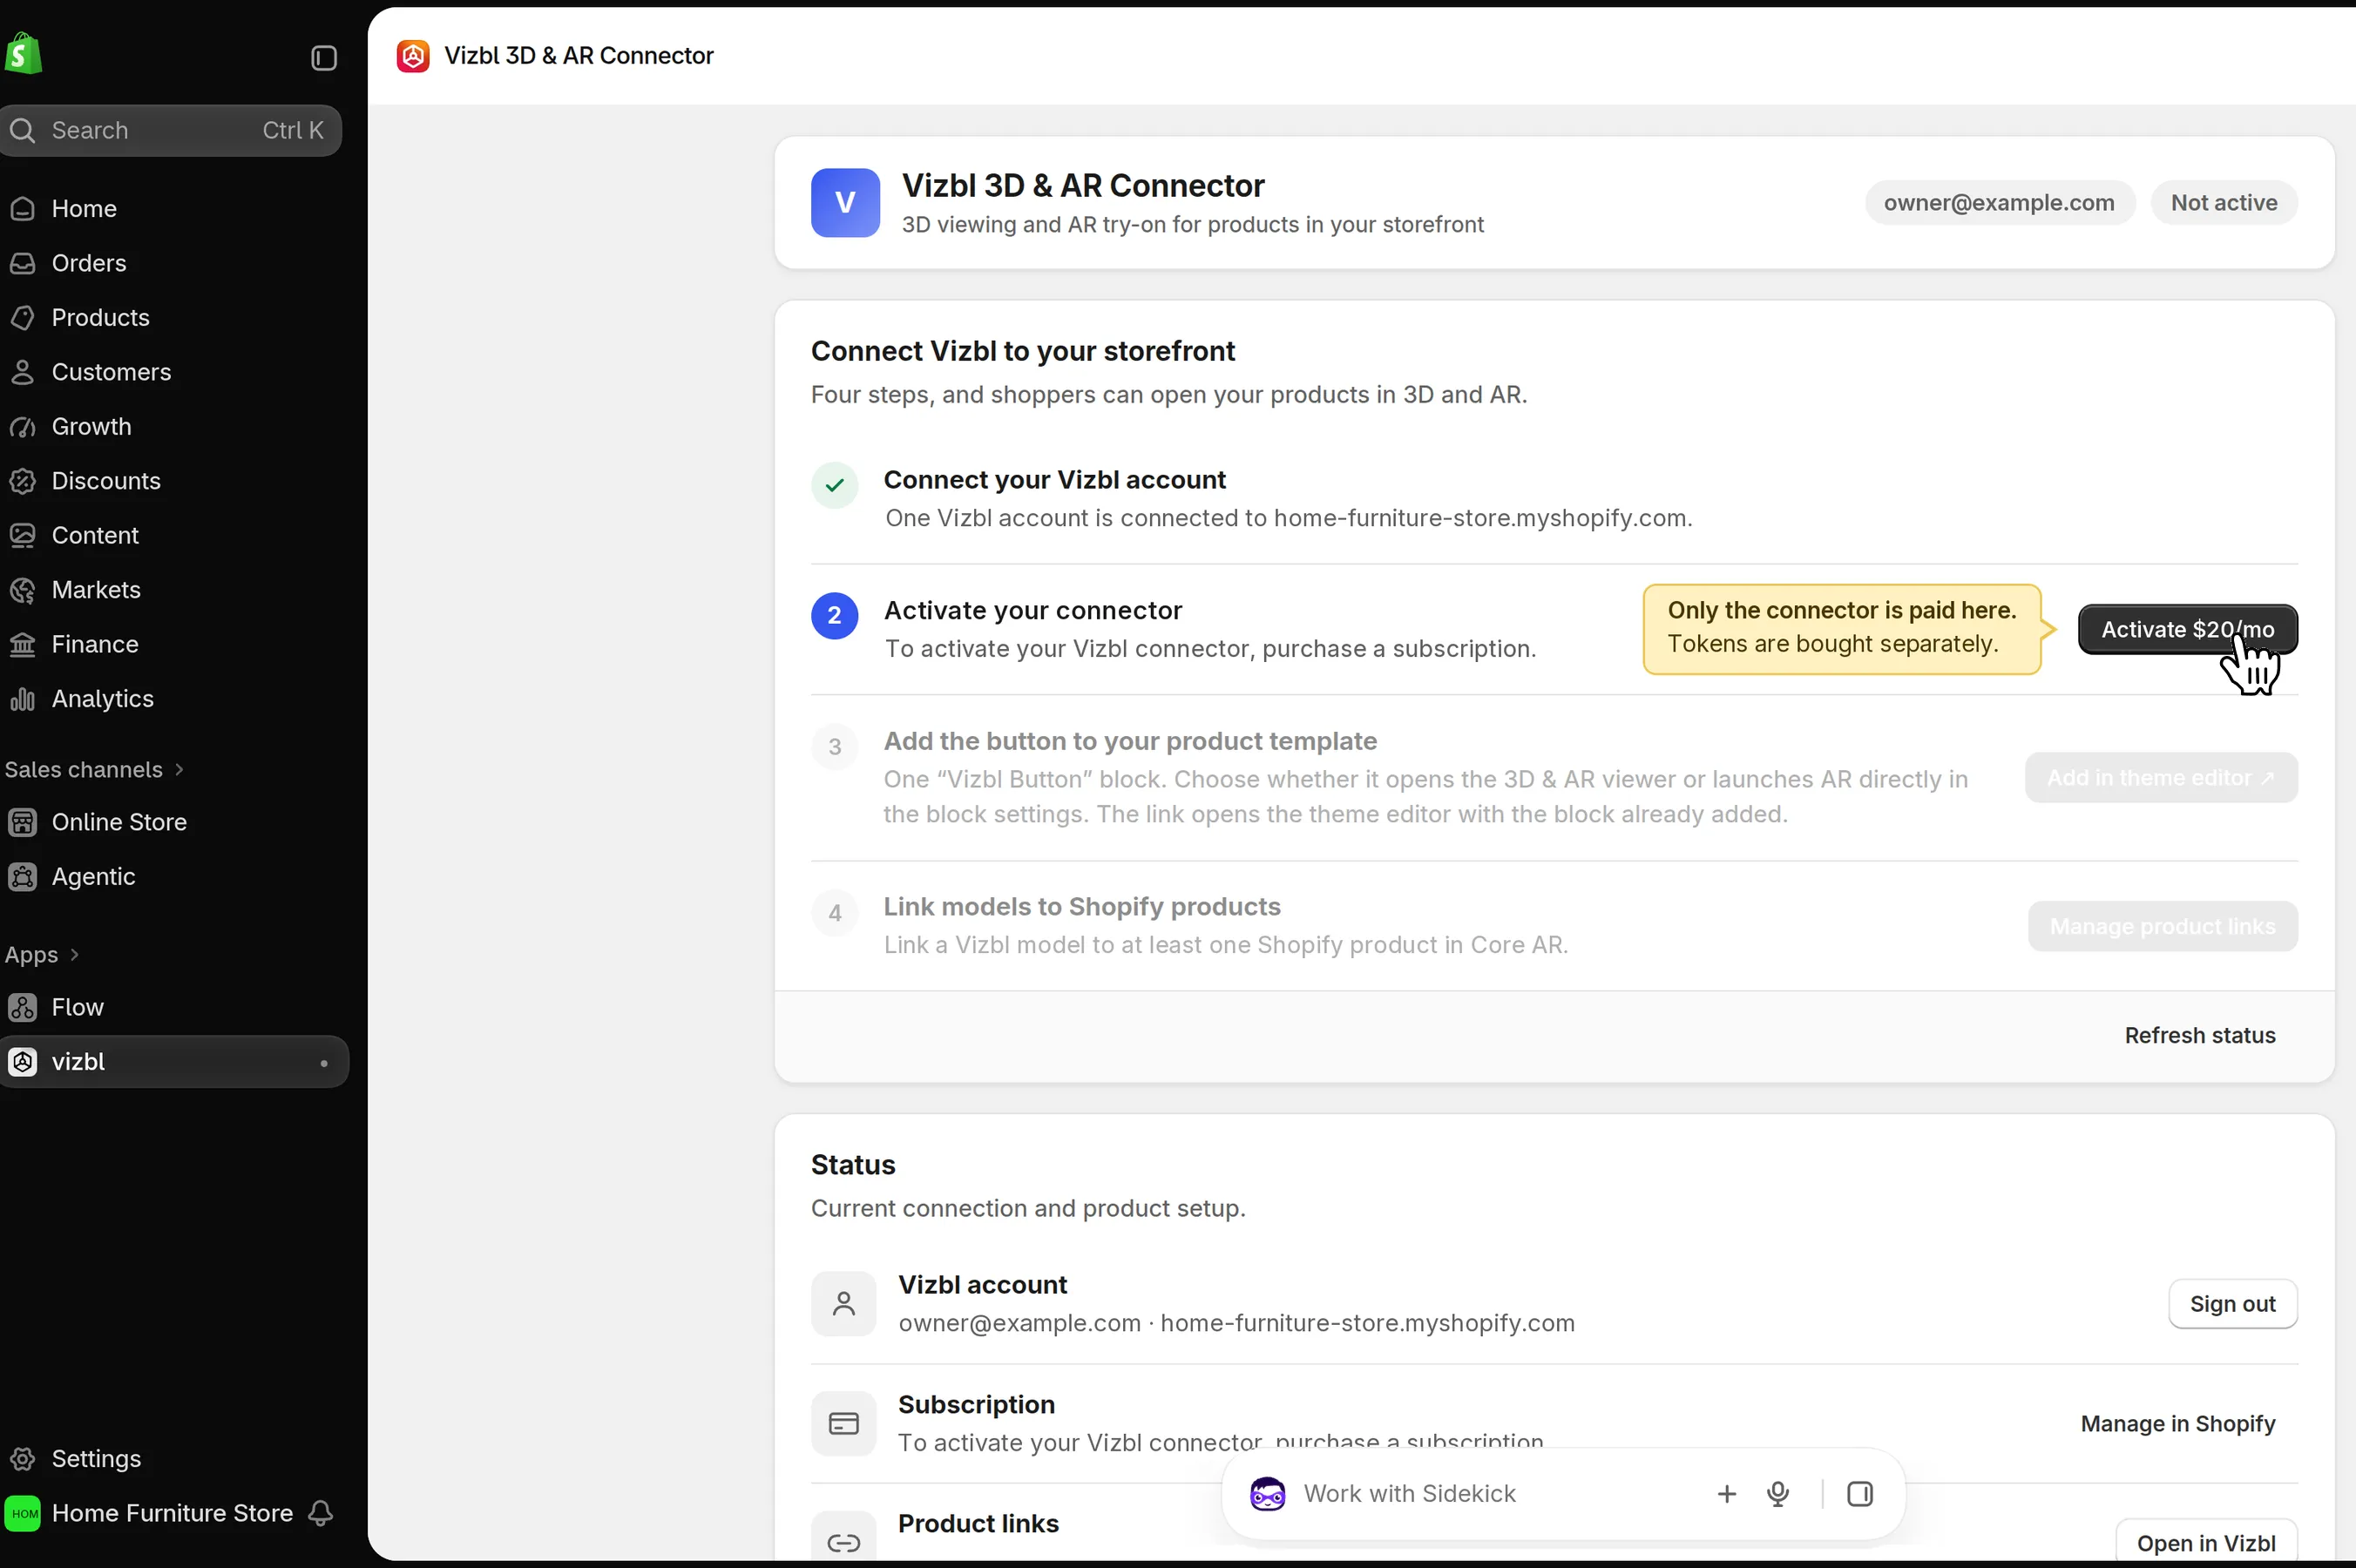
2. Once the charge is approved, the remaining steps unlock: adding the Vizbl button to your store’s theme and linking models to products. You can complete them in any order.
Adding a custom AR button to your Shopify theme
Linking Shopify products to 3D models
Adding your store domain
Your store domain isn’t added to your list of allowed domains automatically. You need to add it yourself. Otherwise, the Vizbl button will appear in your store but won’t work.
1. In your Core AR dashboard, click your profile icon in the bottom-left corner to open your account settings.
2. Go to the Domains tab, click Add domain, and enter your store’s domain, the address shoppers use to visit it. For example, shop.com.
Managing your subscription
Open the connector in your Shopify admin. In the Status section, the Subscription row has two buttons:
- Manage in Shopify — opens the billing settings in your Shopify admin;
- Cancel plan — cancels the subscription. The Vizbl button keeps working until the end of the billing period you’ve already paid for, then disappears from your store. Your models and their links to products stay in Vizbl, so if you resubscribe, everything is restored and you won’t have to set it up again.
Removing the connector
Uninstall the connector from your Shopify admin, just like any other app. Shopify stops charging you for it, and the Vizbl button disappears from your product pages right away.
To start using the connector again, reinstall it and sign in to the same Vizbl account. Your models and their links to products are stored in Vizbl, so everything is restored just as you left it.
Get help in our Discord
Join our Discord to ask questions about these instructions or get technical support. If something isn’t working, open a ticket and our team will investigate.